My 1939 Ford Standard Coupe - The Restoration
The restoration photos will reflect the nature of this work....different, unrelated parts may be redone and/or painted at varying times. I'll post groups of pictures about particular items as I finish them. For example, the refinishing of the dashboard may be followed by some engine work. I will return to the dashboard later when I am ready to complete its installation. Gradually, everything will come together to complete the car.
I may also show some pictures from the tear-down phase that help show a part in its "Before" and "After" condition for comparison purposes.
For those who may not have rebuilt a car like this project, the restoration will take some time....perhaps a couple years before it's ready to drive on the street. For that reason, the Restoration pages of this web site will take some time to be completed. The car was started on in late Spring of 2002. My original goal was to have the body back on a running chassis by the summer of 2003. If you are interested in following this project be sure to check back from time to time to see the progress.
I do not have pictures of the teardown of the 59A flathead block that is going into the car. I disassembled the engine (which I found in central Ohio) completely so that I could have it acid dipped and magnafluxed. The block turned out to be a service replacement for a pre-war car...it had the 3-1/16" bore (no sleeves) and the three bolt timing cover. After getting the block cleaned out, I took it to a machine shop where it checked out ok. There were two minor cracks going from a stud hole to a water jacket hole, but otherwise the block was good. The crank was also real nice. I decided to have it bored out to 3-3/16" which was the standard bore for the usual 59A blocks. We had the crankshaft turned "ten under". I had a set of good Offenhauser "400" heads which they cleaned up and checked for flatness. I ordered in all the rebuild parts (bearings, camshaft, valves, valve springs, adjustable lifters, oil pump, gaskets, etc). I let the machine shop get the pistons and rings. They fit up the pistons and the floating connecting rod bearings for me.
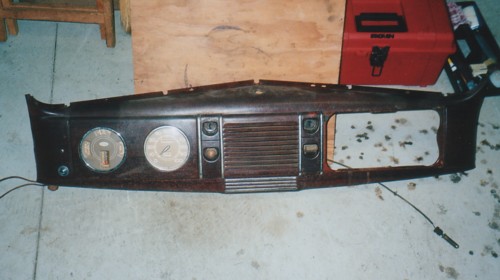
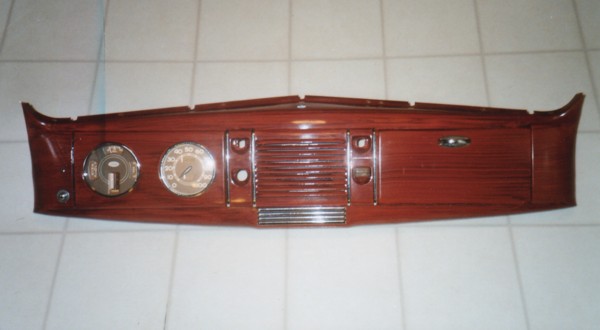
Here's a shot of the original dashboard. The picture actually makes it look better than it was. This photo also looks darker than the actual dash color. The paint and woodgrain were lousy on the exterior. The backside was actually fairly decent, and this was the way I picked up on the base color to use for the restoration.
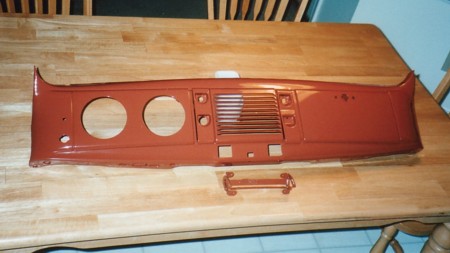
I had decided to use the powder paint shop I had used for some other parts. First, I removed all the gauges and trim pieces. I gave them a total of six items, which included the glovebox door and bracket. They sandblasted the dash and the other loose parts in their cabinet blast.
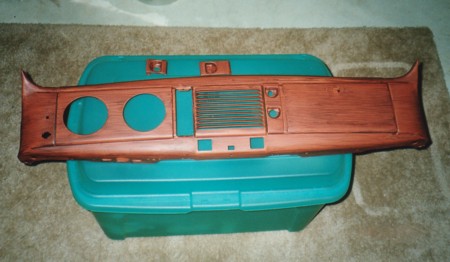
I used a mahogany stain which, when used on the
base color, gave me a finish that is very close to the original.
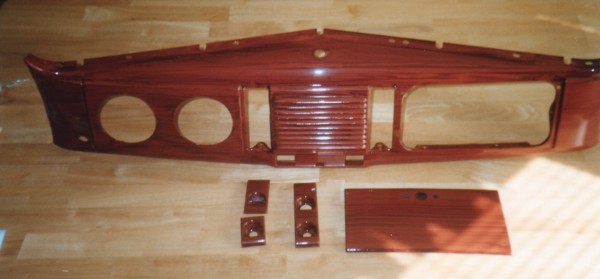
My chrome was in pretty decent shape. If it had been badly pitted (or missing) I would have had to locate some replacement pieces. As it is, the plastic knobs (there are four in all) are discolored and starting to crumble. I have ordered reproduction replacements.