My 1939 Ford Standard Coupe - The Restoration
How to remove that pesky lock cylinder in your old Ford? I'd heard the answer many times, but never tried it myself. My key worked in the lock, but only about 50% of the time. It seemed to hang up a lot, so I figured I better tidy things up and have some fresh keys made.
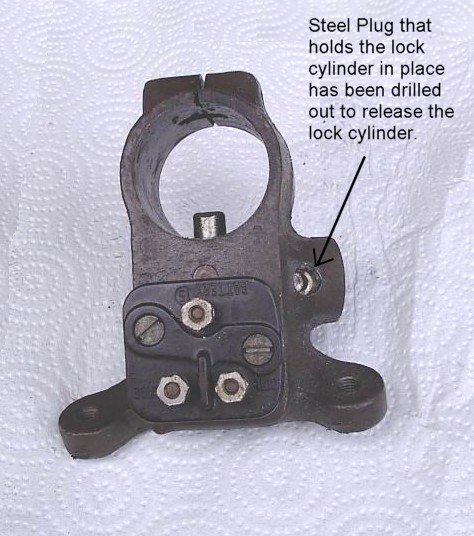
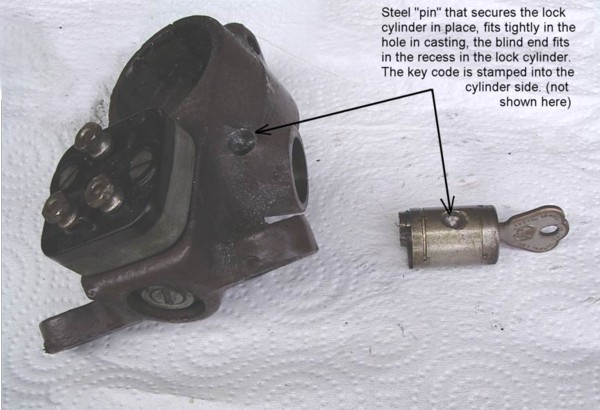
The first order of business was to get the lock cylinder out. This view shows the underside of the locking assembly. The hole to the right had a steel pin which was recessed in the bore about 1/8" and was tightly tapped into place. As you will see, the blind end of the pin rests in a small recess in the lock cylinder, holding it in place and preventing someone from simply pulling it out to steal a car.
Very carefully, I drilled down into the center of the pin with a 1/8" drill bit. Unfortunately, this whole assembly is awkward to hold. I placed it in my drill press vise and used the drill press to drill, but the part and/or the bit wandered off to the side a bit as it dug in. I went as far as I dared and pulled it out of the vise.
Next, I placed it on a rag and got out my handy, dandy Dremel tool. I used a tungsten carbide straight bit to open up the hole. I just swept the bit around and around, carefully removing the metal pin but trying to stay within the bore of the hole. I had to get my hand electric drill out and use the regular 1/8" bit again to dig in a little deeper. I finished things out with the Dremel tool and the carbide bit. I was warned to watch for bits of brass....you are starting to hit the lock cylinder assembly if you do.
I was lucky and careful. I barely touched the
lock cylinder, and it came out without any damage.
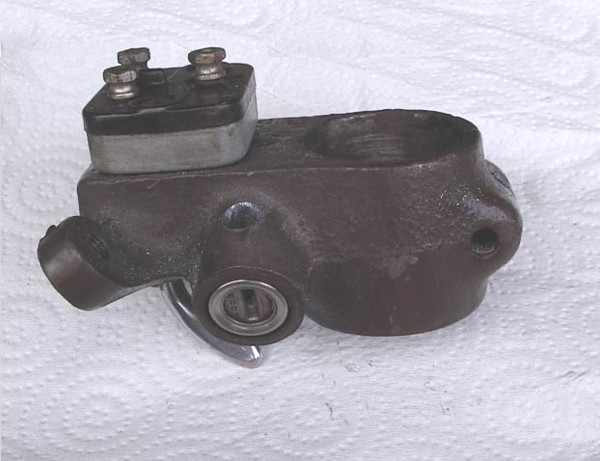
The electric contact box is easily removed by two flat head screws in the bakelite cover.
In the picture above, you can see the steel pin that moves in and out of the center of the steering column. This engages a slotted collar on the steering shaft, providing the steering lock that Fords were famous for. When you turn your car's key, you are unlocking this pin AND unlocking another little pin that allows the "Off/On" toggle switch to move back and forth.
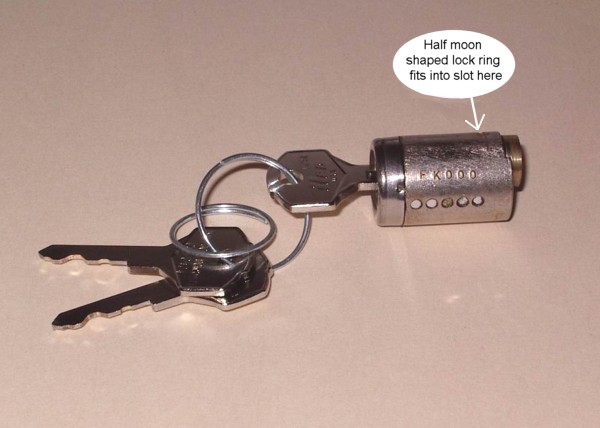
I watched him carefully pry the small brass lock ring from the back of the cylinder. No amount of lubricant or tapping would let my key work the lock. With great difficulty he managed to tap a very sharp edged screwdriver into the gap between the cylinder and the stainless cap which is crimped on. He kept working slightly larger and larger screwdriver tips in until he was able to pop the cover off.
Due to a broken spring in one of the tumbler/pin holes, it took a bit more time to release the center rotating part of the lock from the cylinder. He found a replacement spring, carefully filed the center part down in such a way that the new keys would work smoothly. I had to pitch the old key and now have three new keys and a working lock.
Note: for the security of my lock, I changed the code numbers and letters shown in this photo. The example is typical of what is generally stamped into the lock. I believe this was a Hurd lock. Ford also purchased locks made by Briggs & Stratton.

The colors do not show up properly in this picture, but I repainted the lock assembly the same color as the steering column tube. I left the lock cylinder assembly out, and carefully masked off the rest, including the Off/On switch.
On reassembling, I added a few drops of 3 in 1 oil to the sliding lock mechanism. My locksmith lubed the lock with graphite after a total cleaning, so I did not add anything to that. Everything works smoothly now.